
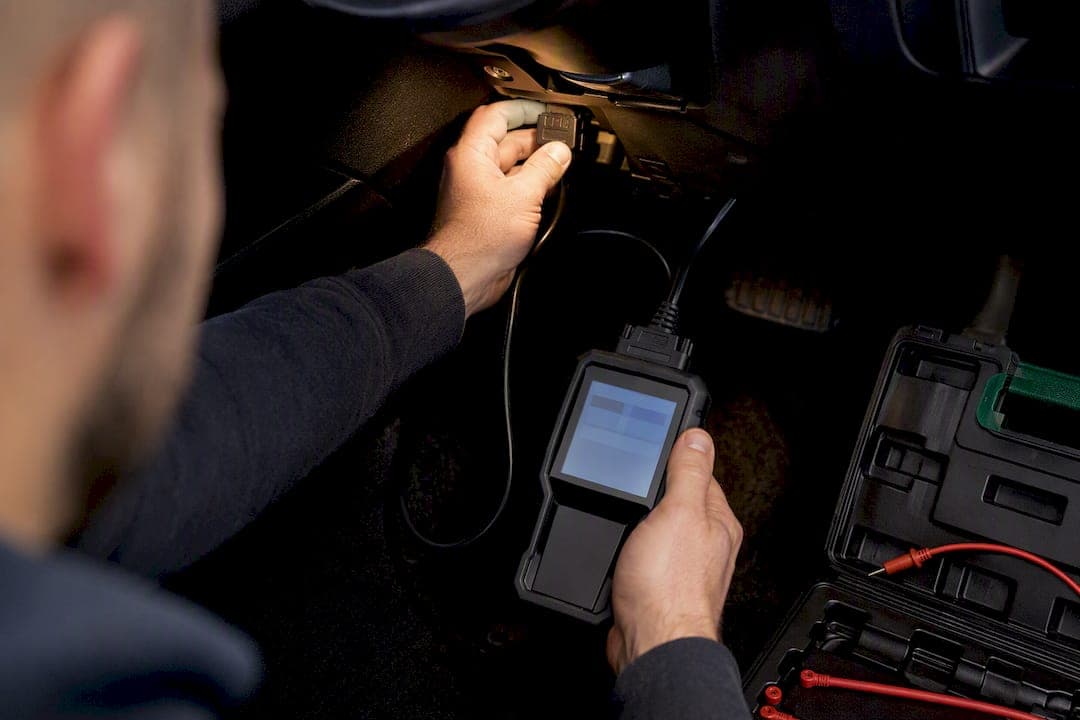
Treat any illuminated airbag light as safety-critical, not cosmetic. Isolate the battery, wait for the SRS capacitor to discharge, then run an SRS-capable scan tool before touching any wiring. These are the essential airbag diagnostics steps: read current, stored, and freeze-frame codes first, and never probe a live squib circuit with a multimeter.
TL;DR:
- Always confirm an airbag warning light is safety-critical and follow a strict diagnostic sequence rather than guessing, to avoid unnecessary parts replacement.
- Use an SRS-capable scan tool and verify the fault codes alongside freeze-frame data to accurately identify active or intermittent issues.
- Inspect connectors, wiring, and resistance measurements with proper tools, avoiding live circuit testing to prevent accidental deployment.
- Clear crash codes only after documenting all data and performing re-test procedures, as latched crash events require specialist reset services.
- Visual checks around seat wiring, clockspring, and pillar harnesses are common trouble spots for airbag system faults and should be prioritized during diagnosis.
Table of Contents
- Airbag diagnostics steps: the full workflow from light to fix
- Tools and safety prep before you open anything up
- How to interpret SRS fault codes once you have them
- Where the faults actually hide: a visual inspection checklist
- Testing resistance without risking a deployment
- Clearing codes and confirming the repair actually worked
- Why latched crash codes often need a specialist reset
- Getting a latched airbag light sorted without guesswork
- Sources
Airbag diagnostics steps: the full workflow from light to fix
Diagnosing an SRS fault properly is not guesswork with a test light. It is a fixed sequence, and skipping steps is exactly how people end up replacing a perfectly good clockspring or, worse, get a resistance reading wrong on a live pyrotechnic circuit. Follow this order every time.
-
Observe and record the trigger event. Before you plug in a scanner, ask what happened just before the light came on. Was there a recent collision, however minor? A battery disconnect for other work? Seat removal, carpet replacement, or dashboard trim work? Technicians frequently trace persistent SRS lights back to interior removal-and-installation jobs rather than crash damage, because a connector gets bumped and never seated fully.
-
Confirm your scanner actually supports SRS. A basic OBD2 code reader that only pulls generic P-codes will not touch the airbag module. You need a tool with manufacturer-level SRS coverage to read current codes, historical (stored) codes, and freeze-frame data such as battery voltage and ignition cycle count at the moment the fault logged.
-
Check the basics before you go near live testing. Pull the SRS fuse and inspect it. Check battery resting voltage, since a weak or sagging battery can trigger spurious low-voltage codes that have nothing to do with the airbags themselves. Visually inspect connectors, particularly the yellow SRS ones, for corrosion or partial engagement.
-
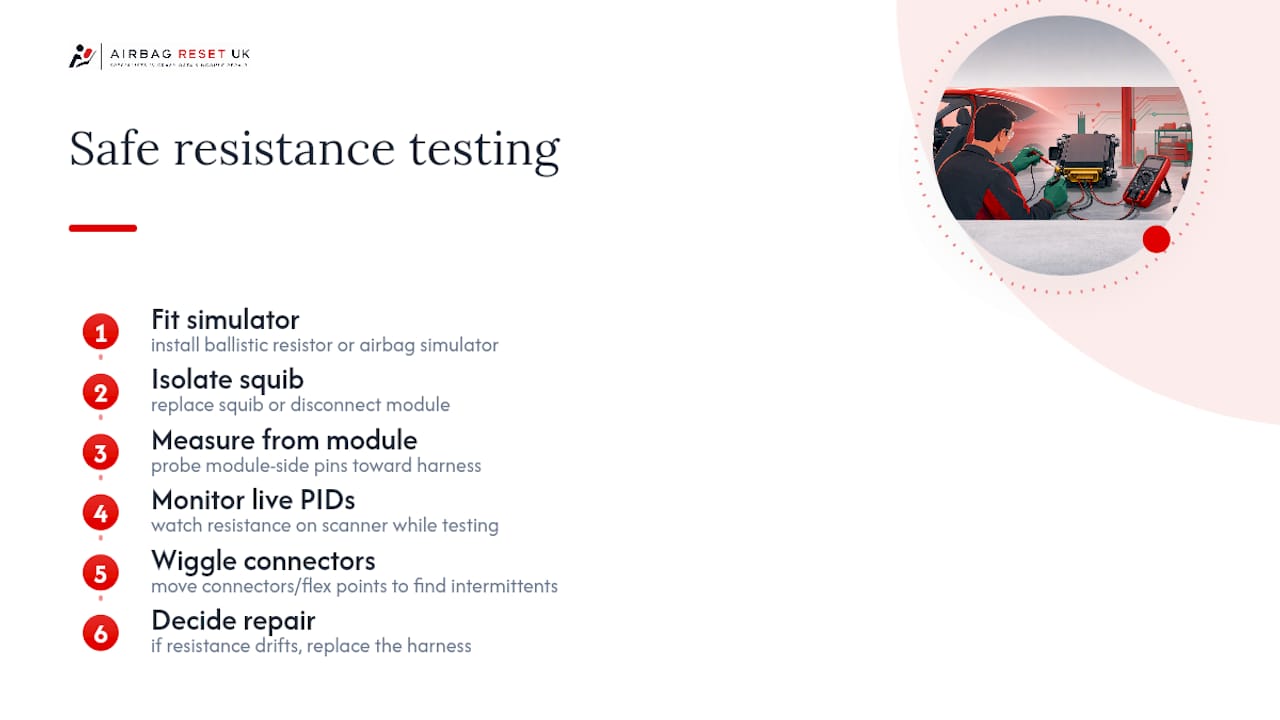
Test resistance safely, then wiggle-test. Use an inert squib simulator or module-side testing to check loop resistance without ever applying current to a live squib. With the connector reconnected and the scanner running live PIDs, gently flex harnesses at known flex points (seat rails, door sills, the base of the clockspring) and watch for resistance spikes on screen.
-
Carry out the targeted repair, then clear codes properly. If you found a loose or corroded connector, reseat or repair it. If the clockspring shows classic wear symptoms, replace it. Once the physical fix is done, clear codes using the correct manufacturer sequence, not just a generic "clear DTC" button, since some systems expect a specific key cycle or a particular scan tool command.
-
Recognise when the fault is beyond a simple clear. If the code returns immediately, stays "current" rather than dropping to "stored," or the freeze-frame data shows a deployment event, you are looking at latched crash data. That needs a professional crash data reset service or, in the case of deployed hardware, physical module and component replacement.
That sequence, observation, scan, inspection, safe testing, repair, and verification, mirrors the stepwise process professional workshops use for airbag module diagnostics, and it is the same order whether you are working on a family hatchback or a garage full of trade jobs.
Tools and safety prep before you open anything up
Rushing into SRS work without the right kit is how minor faults turn into expensive mistakes. Before you remove a single trim panel, gather:
- An SRS-capable scan tool (OEM-level or a serious aftermarket unit, not a budget code reader)
- An inert squib simulator or ballistic resistor for safe resistance testing
- Basic insulation tools and non-marring trim removal tools
- A multimeter rated for automotive low-voltage work
Disconnect the negative battery terminal first, then wait. Manufacturer guidance typically calls for a discharge period before the SRS backup capacitor bleeds down safely, and rushing this is the single most avoidable risk in the whole job. Every yellow connector in the system should be treated as live until you have confirmed otherwise, a rule that comes directly from standard SRS diagnostic practice.
Pro Tip: Cheap generic scanners often show "no faults found" on SRS systems simply because they cannot read the module at all, not because the system is actually clean. If a budget tool gives you a suspiciously clean scan on a car with a lit airbag light, that is a red flag on the tool, not the car.
How to interpret SRS fault codes once you have them
Not every code means the same thing, and the diagnostic value is in the detail, not just the code number. A current code means the fault is active right now. A stored or historic code means it happened but is not present at this exact moment, which usually points to an intermittent connection. Freeze-frame data, particularly battery voltage and ignition cycle count at the time of the fault, tells you whether the issue coincided with a low-voltage event or a specific drive cycle.
Common code groups tend to cluster around a handful of usual suspects:
- Driver-side squib or clockspring codes, often linked to steering wheel electrical continuity
- Passenger occupant classification system (OCS) and seat-harness codes, frequently tied to seat wiring flex points
- Pretensioner and curtain airbag loop codes, usually pointing to pillar or headliner wiring
- Communication or module error codes, which can indicate a wiring or module-level fault rather than a sensor problem
Write every code down, along with its freeze-frame data, before you clear anything. Cross-check unfamiliar codes against manufacturer service information rather than guessing from a generic code list, since B-code definitions vary between manufacturers far more than engine codes do.
Where the faults actually hide: a visual inspection checklist
Most SRS faults are not exotic. They are boring, physical, and sit in a handful of predictable spots.
- Under-seat connectors and seat-belt buckle wiring. These flex every time someone gets in or out of the car, and flex-zone wiring failures here are among the most common causes of intermittent OCS and seat-harness codes.
- The driver's clockspring. Symptoms include intermittent horn failure, cruise control dropouts, or steering wheel controls cutting out alongside the airbag light, all pointing to the same rotating connector wearing out.
- Pillar and headliner wiring for curtain airbags. Check for pinched harnesses after trim work, and always verify module connectors are fully seated and free of corrosion, particularly on vehicles that have had water ingress.
Testing resistance without risking a deployment
Never connect a standard multimeter directly across a live squib connector. Applying current, even briefly, from the wrong source can, in theory, fire the igniter. The accepted safe method is fitting a ballistic resistor or airbag simulator in place of the squib, then measuring from the module side, or disconnecting the module and testing from the module-side pins towards the harness.
Deployment loop resistance is specified within a narrow tolerance band by most manufacturers, which is precisely why small changes cause codes. A reading drifting outside that tight window, even by a small margin, is often enough to set a fault. Perform wiggle tests at connectors and known flex points while watching live resistance PIDs on the scanner, since intermittent resistance problems frequently only show up under mechanical movement or after the harness has warmed up. If resistance keeps drifting despite a clean visual inspection, that usually means harness replacement rather than another round of connector cleaning.
Clearing codes and confirming the repair actually worked
Do not clear anything until you have documented every code and its freeze-frame data. Some manufacturers require a specific clear sequence rather than a generic erase command, and skipping the correct routine can leave the fault memory in an odd state.
- Record all current and historic codes plus freeze-frame data first.
- Clear codes using the manufacturer-correct sequence for that platform.
- Turn the key to "on" and confirm the airbag light does its normal bulb-check flash, then extinguishes.
- Road-test the car, particularly over the flex points you identified earlier, then re-scan to confirm nothing has returned.
- Run OCS calibration if the seat or seat sensor was disturbed during the repair.
Persistent illumination after this sequence almost always means either a physical fault you have not found yet or a latched crash-data flag that a standard clear cannot touch.
Why latched crash codes often need a specialist reset
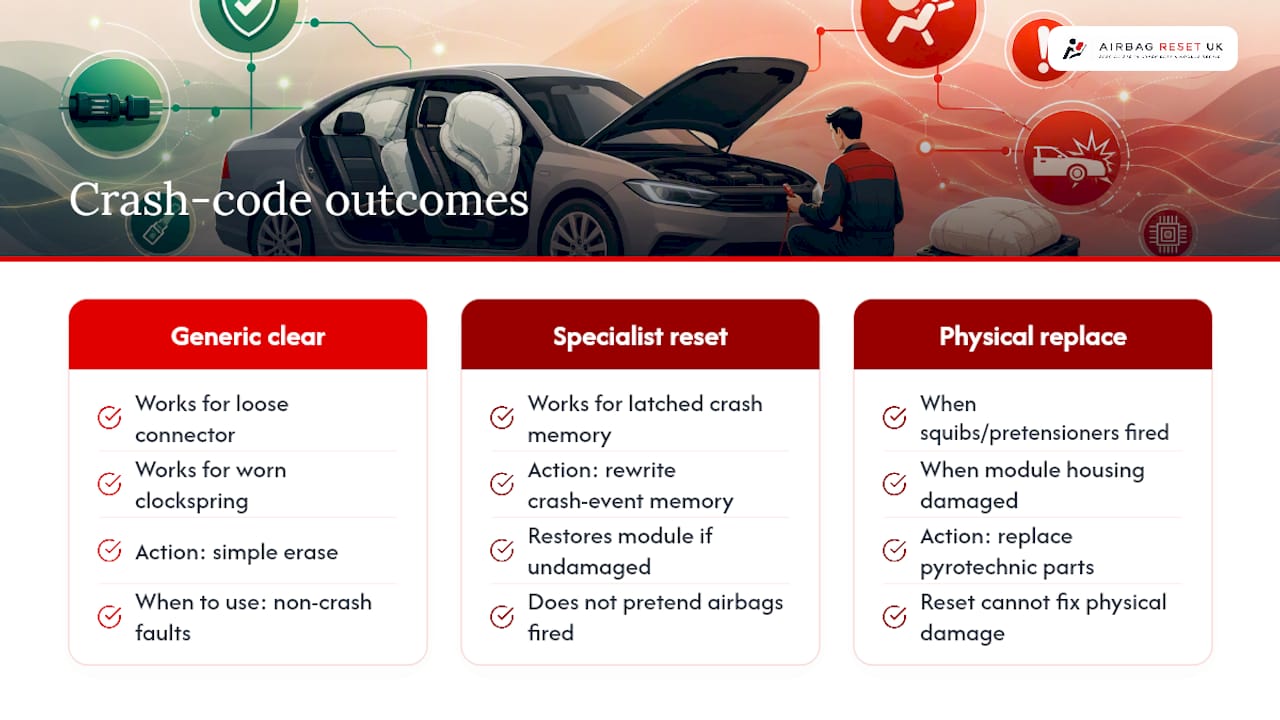
Generic code-clearing works fine for a loose connector or a worn clockspring. It does not work when the module has latched a genuine crash event into its memory, which some manufacturers deliberately design to resist a simple erase. That is not a bug. It is a safety feature meant to stop a crashed module being waved through as fine.
A specialist reset service rewrites that crash-event memory using manufacturer-aware procedures, which restores the module to a workable state without pretending the airbags were never deployed, since the physical pyrotechnic components still need replacing separately if they actually fired. Use a reset when the module itself is undamaged and simply logged the event. Use physical replacement when squibs, pretensioners, or the module housing were genuinely triggered or damaged, no reset changes that.
— John
Getting a latched airbag light sorted without guesswork
If your diagnostics steps have pointed to a latched crash code rather than a wiring fault, a specialist reset service resolves it directly, without the wait and expense of sourcing a brand-new module. Postal reset services can cover airbag ECUs from cars, vans, and motorhomes, with pricing details available on the provider's website.
This will not fix a physically damaged harness, deployed pretensioner, or crashed clockspring, those still need physical repair or replacement, but for a module that has simply latched crash data after a bump or a false trigger, a reset service can significantly reduce waiting times compared to waiting for dealer repair. Send a photo or part number for a free identification check, get a fixed quote, then post the module using the postal reset service and get it back reset and ready to refit.
Sources
SAE J1630 covers deployment test procedure; see also SCR system self-diagnosis steps and Airbag Reset UK.
- Air Bag Module Diagnostics and Replacement — Chuck Olsen (Repairer Driven News PDF)
- Motor — Diagnosing intermittent airbag resistance
- How to test an airbag safely after a trouble code — Ricks Free Auto Repair Advice